Maple Donut Bars: 10 Easy Steps to Soft, Sweet Perfection
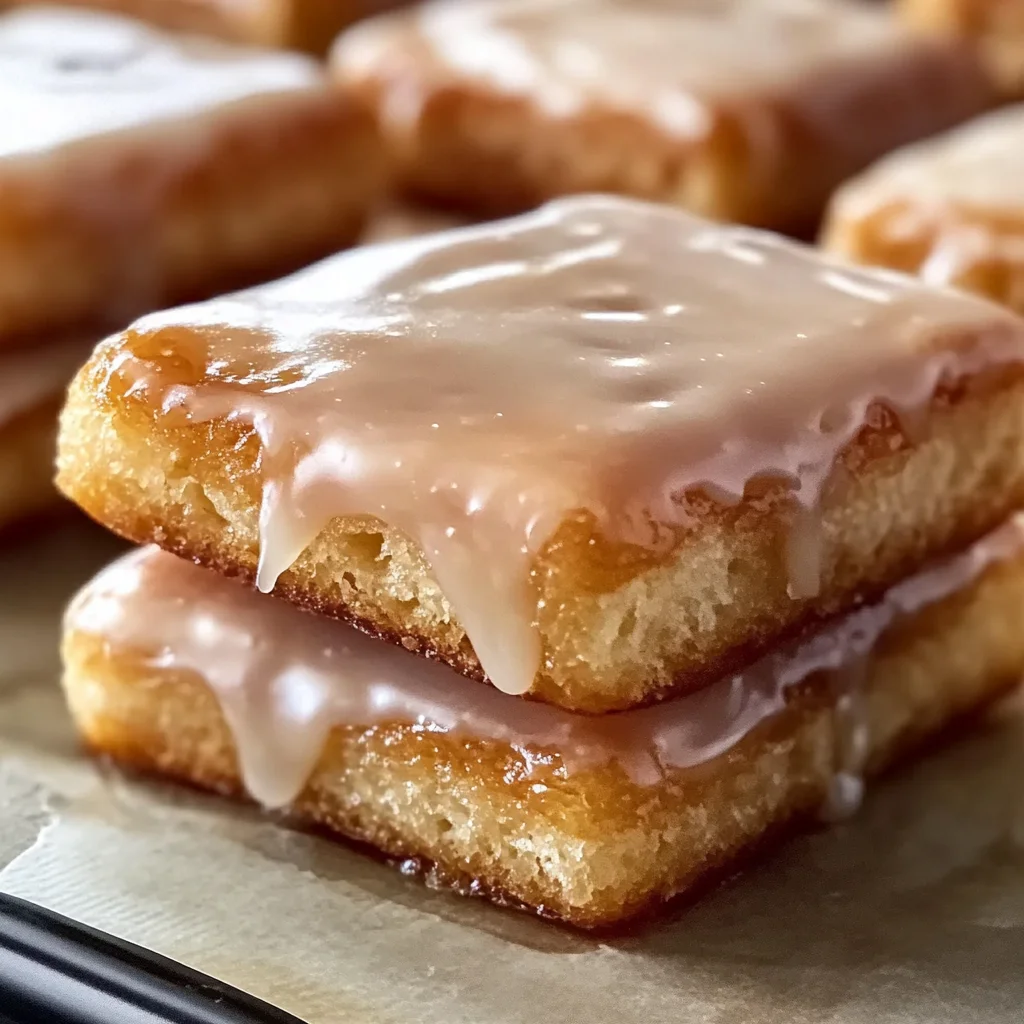
If you’re looking for a sweet treat that brings joy to any occasion, you’ve come to the right place. Maple donut bars are just what you need for a cozy breakfast or an afternoon pick-me-up. Imagine biting into a soft bar topped with a luscious maple glaze – it’s pure bliss! This recipe, Maple Donut Bars: 10 Easy Steps to Soft, Sweet Perfection, is simple enough for busy weeknights yet impressive enough for family gatherings.
What makes these bars special is their delightful flavor and tender texture. With minimal effort, you can create a batch that will have everyone asking for seconds. Whether you’re enjoying them with coffee in the morning or as a treat after dinner, these maple donut bars are sure to become a favorite!
Why You’ll Love This Recipe
- Quick and easy: You can whip up these donut bars without any fuss, making them perfect for busy days.
- Family-friendly: Everyone loves the sweet taste of maple, and these bars are sure to please both kids and adults alike!
- Make-ahead option: Bake them in advance and store them for later – they’re just as delicious when enjoyed fresh or from the fridge.
- Versatile flavors: You can customize your bars with different spices or toppings to suit your mood.
- Perfectly sweet: The combination of maple syrup and warm spices creates a comforting flavor that feels like a warm hug.
Ingredients You’ll Need
Let’s gather some simple, wholesome ingredients that you likely already have at home. These elements come together beautifully to create the softest, sweetest maple donut bars you’ll ever make!
For the Batter
- 2 cups all-purpose flour
- 1 cup granulated sugar
- 2 teaspoons baking powder
- ½ teaspoon baking soda
- ½ teaspoon salt
- 1 teaspoon ground cinnamon
- ½ teaspoon ground nutmeg
- ½ cup whole milk
- 2 large eggs
- ¼ cup unsalted butter, melted
- 2 teaspoons vanilla extract
- ¼ cup maple syrup (for the batter)
For the Glaze
- ¼ cup maple syrup (for the glaze)
- 1 cup powdered sugar
Variations
One of the best parts about this recipe is its flexibility! Feel free to mix things up and make it your own.
- Add nuts: Toss in some chopped walnuts or pecans for an added crunch and flavor.
- Try different spices: Experiment with cardamom or ginger instead of cinnamon for a unique twist.
- Top with sprinkles: Make your maple donut bars festive by adding colorful sprinkles on top of the glaze.
- Change the sweetness: If you prefer less sweetness, reduce the amount of sugar in the glaze for a lighter finish.
How to Make Maple Donut Bars: 10 Easy Steps to Soft, Sweet Perfection
Step 1: Preheat Your Oven and Prepare the Pan
Start by preheating your oven to 350°F (175°C). Greasing your 9×9-inch baking dish with cooking spray or butter ensures that your delicious bars won’t stick. This step is crucial because we want every bite to come out perfectly!
Step 2: Mix Dry Ingredients
In a medium-sized bowl, whisk together all-purpose flour, granulated sugar, baking powder, baking soda, salt, cinnamon, and nutmeg. Mixing these warm spices into your dry ingredients adds depth of flavor that makes each bite feel extra comforting.
Step 3: Combine Wet Ingredients
In another bowl, whisk together whole milk, eggs, melted unsalted butter, vanilla extract, and maple syrup. This combination not only provides moisture but also infuses those amazing flavors into your batter. The maple syrup is key here!
Step 4: Incorporate Wet and Dry Ingredients
Slowly add your wet mixture into the dry ingredients. Stir gently until everything is combined but be careful not to overmix! We want our donut bars light and fluffy rather than dense.
Step 5: Pour the Batter into the Pan
Pour your batter into the prepared baking dish. Use a spatula to spread it evenly across the pan; this helps ensure that all parts of your delicious creation bake uniformly.
Step 6: Bake the Donut Bars
Pop those bars in the oven and bake for about 25-30 minutes. They should turn golden brown on top and have a soft cake-like texture inside. A toothpick inserted into the center should come out clean!
Step 7: Make the Maple Glaze
While your delicious bars are baking away, prepare the glaze! In a small bowl, whisk together powdered sugar and maple syrup until smooth. If it’s too thick for drizzling, add just a touch more syrup until it reaches pourable consistency.
Step 8: Cool the Donut Bars
Once they’re done baking, let your donut bars cool in their pan for about 10 minutes. This cooling period helps them firm up slightly so they’re easier to cut without falling apart.
Step 9: Glaze the Bars
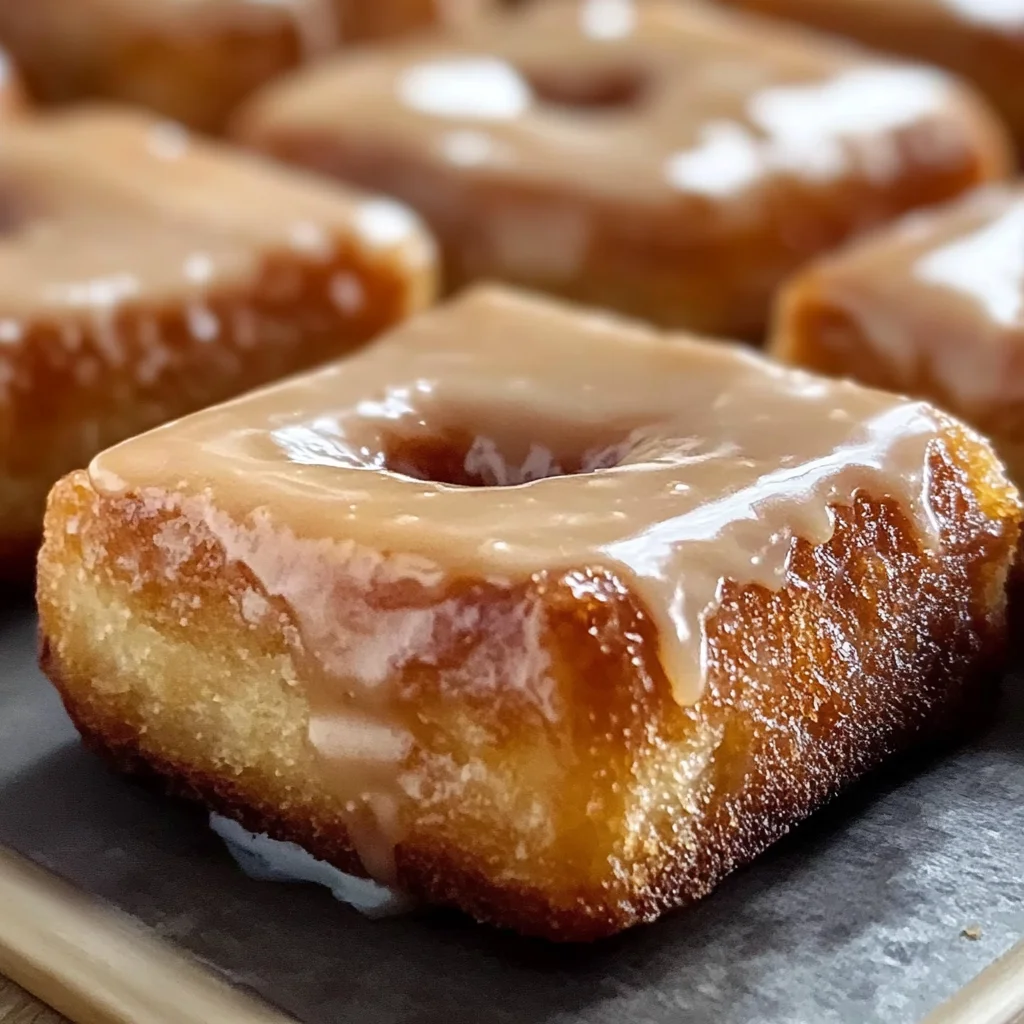
Now comes my favorite part! Drizzle that lovely maple glaze generously over each bar while they’re still warm. Let it set for just a few minutes; this creates an irresistible sticky coating.
Step 10: Serve and Enjoy
Finally! Slice those beautiful donut bars into squares and serve them warm or at room temperature. Enjoy every soft bite paired perfectly with your favorite cup of coffee or tea – pure perfection!
Pro Tips for Making Maple Donut Bars: 10 Easy Steps to Soft, Sweet Perfection
Baking is a delightful journey, and with a few simple tips, you can ensure your maple donut bars turn out perfectly every time.
-
Use Fresh Ingredients: Using fresh baking powder and spices ensures that your bars rise well and have the best flavor. Old ingredients can lead to dense or flat bars.
-
Don’t Overmix the Batter: Gently folding the wet and dry ingredients together helps maintain a light texture. Overmixing develops gluten, which can result in tough bars rather than soft, tender ones.
-
Check for Doneness Early: Ovens can vary in temperature. Start checking your donut bars a few minutes before the recommended baking time to prevent overbaking, which dries them out.
-
Let Them Cool Before Glazing: Allowing the bars to cool slightly before adding the glaze helps it set beautifully without sliding off. This creates that perfect sticky coating that everyone loves!
-
Experiment with Flavors: Feel free to mix in chocolate chips or nuts for added texture and taste. These additions can elevate your donut bars even further and personalize them to your taste preferences.
How to Serve Maple Donut Bars: 10 Easy Steps to Soft, Sweet Perfection
Serving maple donut bars is all about presentation and pairing them with complementary flavors that enhance their sweetness. Here are some ideas to make your treat shine!
Garnishes
-
Chopped Nuts: A sprinkle of chopped pecans or walnuts adds a delightful crunch and complements the sweetness of the glaze.
-
Shredded Coconut: Toasted shredded coconut brings an extra layer of flavor and a tropical touch that pairs wonderfully with maple.
Side Dishes
-
Fresh Fruit Salad: A mix of seasonal fruits provides a refreshing contrast to the sweetness of the donut bars, balancing out flavors on your plate.
-
Yogurt Parfait: Layering yogurt with granola and fruit creates a creamy side dish that complements the soft texture of the bars beautifully.
-
Coffee or Tea: A warm beverage like freshly brewed coffee or herbal tea enhances the cozy experience, making it perfect for breakfast or an afternoon snack.
-
Oatmeal: A warm bowl of oatmeal flavored with cinnamon could serve as a hearty side dish that rounds out the meal while keeping it wholesome.
With these tips and serving suggestions, you’re all set to enjoy your maple donut bars in style! Happy baking!
Make Ahead and Storage
These maple donut bars are not only delicious but also perfect for meal prep! You can whip up a batch ahead of time, making them a convenient and sweet treat whenever you need it.
Storing Leftovers
- Store the cooled bars in an airtight container at room temperature for up to 3 days.
- If you prefer, you can refrigerate them to extend freshness for about a week.
- Keep the glaze separate if possible to maintain its texture.
Freezing
- To freeze, slice the bars and wrap each piece individually in plastic wrap.
- Place the wrapped bars in a freezer-safe bag or container.
- They can be frozen for up to 3 months. Just remember to label and date your packages!
Reheating
- For best results, allow frozen bars to thaw in the fridge overnight before serving.
- To reheat, place them in a microwave for about 10-15 seconds or warm in an oven preheated to 350°F (175°C) for about 5-7 minutes until they are warmed through.
FAQs
Here are some common questions you might have about these delightful maple donut bars:
How can I make Maple Donut Bars: 10 Easy Steps to Soft, Sweet Perfection gluten-free?
You can substitute all-purpose flour with a gluten-free flour blend designed for baking. Ensure that your baking powder is also gluten-free to keep the recipe compliant.
Can I use other flavors instead of maple syrup in my Maple Donut Bars: 10 Easy Steps to Soft, Sweet Perfection?
Absolutely! While maple syrup adds a unique flavor, you can experiment with honey or agave syrup. Just be sure to use similar quantities for sweetness.
What should I serve with my Maple Donut Bars?
These bars pair wonderfully with coffee or tea. You could also serve them alongside fresh fruit or yogurt for a balanced breakfast or snack option.
Can I add nuts or chocolate chips to the recipe?
Yes! Feel free to mix in chopped nuts such as pecans or walnuts, or even chocolate chips into the batter before baking for an extra touch of flavor.
Final Thoughts
I hope this recipe brings warmth and joy into your kitchen! There’s something truly special about indulging in homemade treats that not only taste great but also fill your home with wonderful aromas. Enjoy making these Maple Donut Bars: 10 Easy Steps to Soft, Sweet Perfection and share them with friends and loved ones. Don’t forget – every bite is made sweeter when shared!
Maple Donut Bars: 10 Easy Steps to Soft, Sweet Perfection

Indulge in the delightful warmth of homemade Maple Donut Bars, perfect for any occasion! These soft and sweet treats combine the comforting flavors of maple syrup with a tender cake-like texture, making them a favorite for breakfast or an afternoon snack. With just ten easy steps, you can whip up a batch that’s sure to impress your family and friends. The luscious maple glaze adds an irresistible finish to each bar, creating a dessert that feels special yet is simple enough for busy weekdays.
- Prep Time: 15 minutes
- Cook Time: 30 minutes
- Total Time: 45 minutes
- Yield: Serves about 12 bars 1x
- Category: Dessert
- Method: Baking
- Cuisine: American
Ingredients
- 2 cups all-purpose flour
- 1 cup granulated sugar
- 2 teaspoons baking powder
- ½ teaspoon baking soda
- ½ teaspoon salt
- 1 teaspoon ground cinnamon
- ½ teaspoon ground nutmeg
- ½ cup whole milk
- 2 large eggs
- ¼ cup unsalted butter, melted
- 2 teaspoons vanilla extract
- ¼ cup maple syrup (for the batter)
- ¼ cup maple syrup (for the glaze)
- 1 cup powdered sugar
Instructions
- Preheat your oven to 350°F (175°C) and grease a 9×9-inch baking dish.
- In a medium bowl, whisk together flour, sugar, baking powder, baking soda, salt, cinnamon, and nutmeg.
- In another bowl, combine milk, eggs, melted butter, vanilla extract, and maple syrup.
- Gradually mix the wet ingredients into the dry ingredients until just combined.
- Pour the batter into the prepared pan and spread evenly.
- Bake for 25-30 minutes until golden brown and a toothpick comes out clean.
- While baking, whisk powdered sugar and maple syrup for the glaze.
- Cool bars in the pan for 10 minutes before glazing.
- Drizzle the glaze over warm bars and let it set slightly.
- Cut into squares and serve warm or at room temperature.
Nutrition
- Serving Size: 1 serving
- Calories: 190
- Sugar: 14g
- Sodium: 150mg
- Fat: 6g
- Saturated Fat: 3g
- Unsaturated Fat: 2g
- Trans Fat: 0g
- Carbohydrates: 32g
- Fiber: 1g
- Protein: 3g
- Cholesterol: 35mg