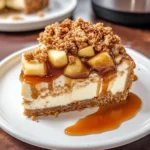
Apple Crisp Cheesecake
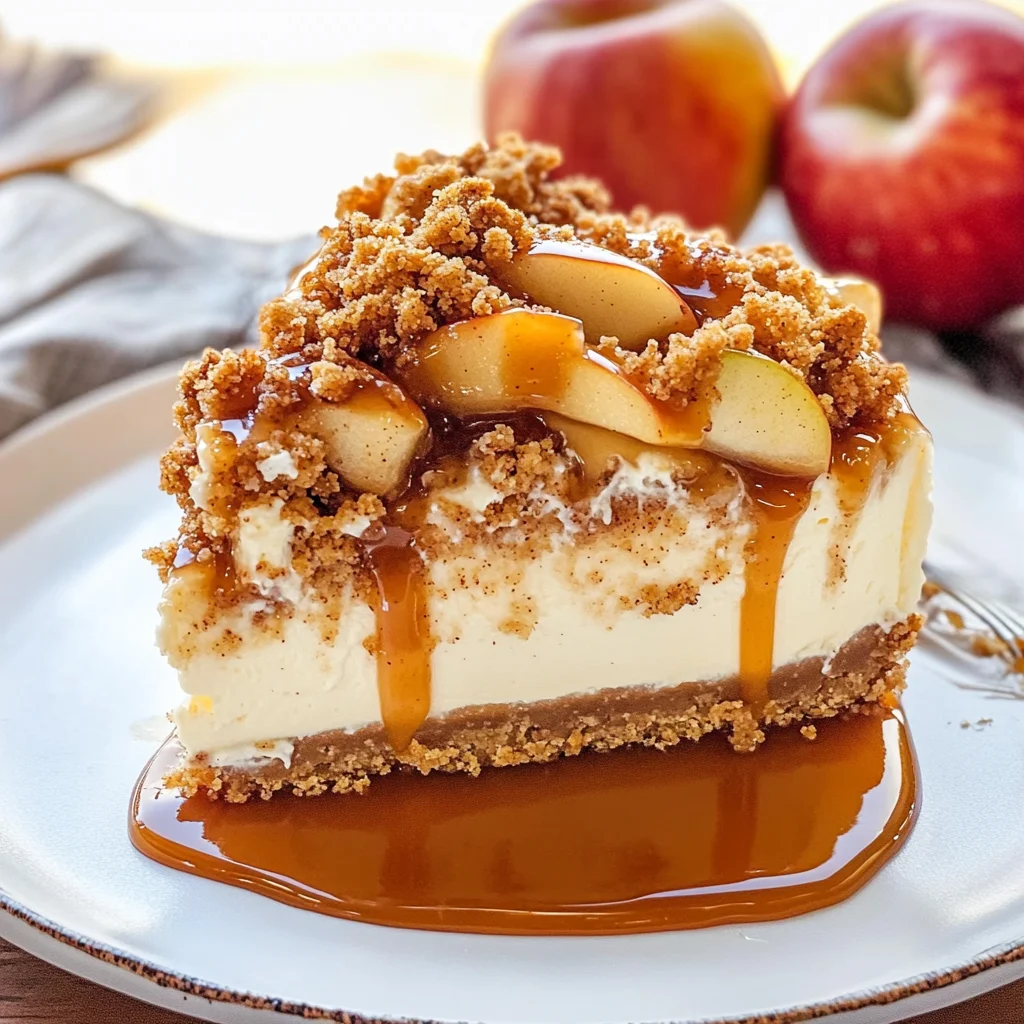
If you’re looking for a dessert that feels like a warm hug, then this Apple Crisp Cheesecake is just what you need! It’s the perfect blend of creamy cheesecake and spiced apples, all topped with a crunchy oatmeal crumble. This delightful treat is not just a dessert; it’s an experience that brings back memories of cozy fall afternoons and family gatherings. Whether you’re hosting friends or just indulging on a quiet evening, this recipe has the ability to brighten your day.
What makes this recipe even more special is how simple it is to prepare. It’s great for busy weeknights when you want something comforting, yet impressive enough for special occasions like birthdays or holidays. Trust me, once you try this Apple Crisp Cheesecake, it will become a staple in your dessert rotation!
Why You’ll Love This Recipe
- Easy to Make: With straightforward steps and simple ingredients, this cheesecake comes together quickly.
- Family-Friendly: Everyone loves the combination of creamy cheesecake and sweet cinnamon apples!
- Make-Ahead Convenience: Prepare it ahead of time and let it chill; it’s even better the next day.
- Delicious Flavor: The harmony of flavors will have everyone asking for seconds.
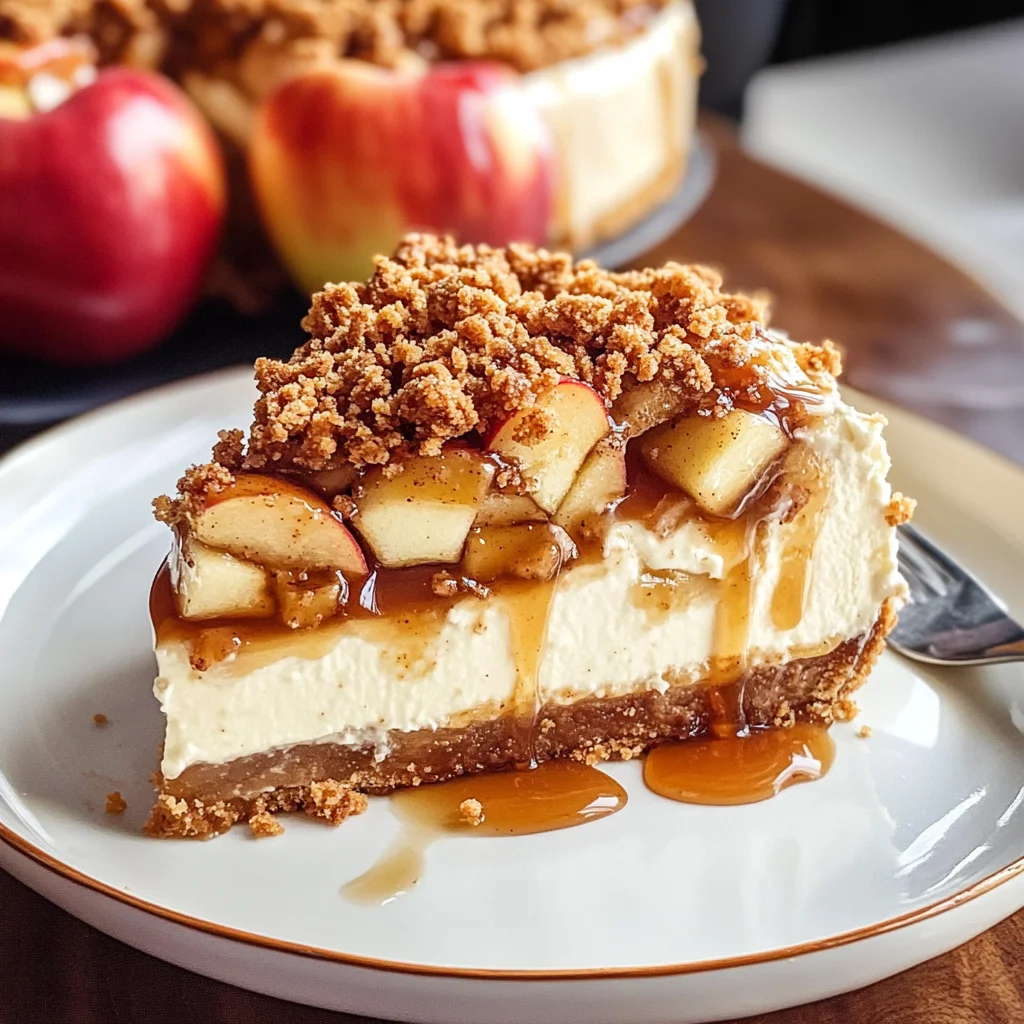
- Gorgeous Presentation: The layers of apples and crumble make it as beautiful as it is delicious.
Ingredients You’ll Need
Gathering the ingredients for this Apple Crisp Cheesecake is part of the fun! They’re all simple, wholesome items that you probably already have in your pantry. Let’s take a look at what you’ll need:
For the Crust
- 3 cups graham crumbs
- 3 tablespoons brown sugar
- 1/2 teaspoon cinnamon
- 1/2 cup unsalted butter (112 grams) (melted)
For the Apples
- 2 large apples (I recommend Granny Smith or Gala)
- 2 tablespoons brown sugar
- 1 1/2 teaspoons cinnamon
For the Crumble Topping
- 1/2 cup all-purpose flour (63 grams)
- 1/2 cup brown sugar (100 grams)
- 1 teaspoon cinnamon
- 1/2 cup quick oats
- 1/4 cup unsalted butter (56 grams) (melted)
For the Cheesecake Filling
- 24 ounces full-fat cream cheese (680 grams) (room temperature)
- 3/4 cup granulated sugar (150 grams)
- 1/4 cup brown sugar (50 grams)
- 1/2 teaspoon cinnamon
- 1 tablespoon cornstarch (or 2 tablespoons all-purpose flour)
- 1 teaspoon vanilla extract
- 1/2 cup sour cream (120 ml) (room temperature)
- 3 large eggs (room temperature)
Other Essentials
- boiling water (for the water bath)
- salted caramel sauce
Variations
This recipe is wonderfully flexible! If you’re feeling adventurous, here are some variations to consider:
- Add nuts: Toss in some chopped pecans or walnuts for an extra crunch.
- Switch up the fruit: Try using pears or peaches instead of apples for a different flavor profile.
- Make it gluten-free: Substitute graham crumbs with gluten-free options or almond flour for the crust.
- Change up the spices: Add a pinch of nutmeg or ginger for a unique twist on the classic cinnamon flavor.
How to Make Apple Crisp Cheesecake
Step 1: Prepare the Crust
Start by preheating your oven to 350F (180C). While that’s heating up, grab your springform pan. Wrap it tightly in tin foil to prevent any water from seeping in during baking. This helps create a lovely texture in your cheesecake! After wrapping, lightly grease it with non-stick cooking spray.
Step 2: Mix the Crust Ingredients
In a mixing bowl, combine graham crumbs, brown sugar, and cinnamon. Pour in melted butter and mix until everything is well combined and resembles wet sand. Press this mixture firmly into the bottom of your prepared springform pan. This crust will provide a delicious base for our cheesecake!
Step 3: Prepare the Apples
Peel and slice your apples into thin pieces. In another bowl, toss them with brown sugar and cinnamon until they are nicely coated. Set these aside while we get our cheesecake filling ready.
Step 4: Make the Cheesecake Filling
In a large mixing bowl, beat room temperature cream cheese until smooth. Gradually add granulated sugar and brown sugar until well combined. Mix in cinnamon, cornstarch, vanilla extract, and sour cream until everything is nicely blended. Finally, add one egg at a time while mixing gently—this step ensures your cheesecake is light and fluffy without being over-mixed.
Step 5: Layer It Up!
Pour half of the cheesecake filling over your crust. Then spread out those beautifully spiced apples evenly on top before pouring over the remaining cheesecake mixture. Give it a gentle shake to settle everything down.
Step 6: Bake with Care
Place your springform pan inside a larger baking dish filled with boiling water—this creates a gentle steam that helps cook your cheesecake evenly without cracks. Bake for about 55 minutes or until it’s set around the edges but still slightly jiggly in the center.
Step 7: Cool Down & Chill Out
Once baked, turn off the oven and crack open the door to let the cheesecake cool slowly within—this helps prevent cracks from forming as it cools down. After about an hour, transfer it to refrigerate for at least four hours or overnight if possible.
Step 8: Serve & Enjoy!
When you’re ready to serve, drizzle some salted caramel sauce over each slice for an indulgent finish! Enjoy every creamy bite of this Apple Crisp Cheesecake—it’s bound to become one of your favorites!
Pro Tips for Making Apple Crisp Cheesecake
Creating the perfect Apple Crisp Cheesecake can be a delightful experience, and these tips will help you achieve cheesecake perfection!
-
Use room temperature ingredients: Bringing your cream cheese, sour cream, and eggs to room temperature prevents lumps in the batter, ensuring a smooth and creamy texture.
-
Don’t skip the water bath: Baking your cheesecake in a water bath helps regulate heat and moisture in the oven, preventing cracks on the surface of your cheesecake.
-
Cool gradually: After baking, allow the cheesecake to cool in the oven with the door ajar before transferring it to the refrigerator. This gradual cooling process helps minimize cracking.
-
Chill overnight: For the best flavor and texture, refrigerate your cheesecake for at least 8 hours or overnight. This allows all the flavors to meld beautifully.
-
Experiment with apple varieties: While Granny Smith and Gala are great options, don’t hesitate to try other varieties like Honeycrisp or Fuji for different flavor profiles and textures.
How to Serve Apple Crisp Cheesecake
Presenting your Apple Crisp Cheesecake can elevate its appeal, making it not only delicious but also visually stunning. Here are some ideas to serve this delightful dessert:
Garnishes
- Whipped cream: A dollop of freshly whipped cream adds a lightness that beautifully contrasts with the rich cheesecake.
- Cinnamon dusting: A light sprinkle of cinnamon on top brings out the warm spices in both the apples and cheesecake.
- Chopped nuts: Toasted walnuts or pecans can add an extra crunch and enhance the flavor profile with their nutty richness.
Side Dishes
- Vanilla ice cream: The classic pairing! A scoop of creamy vanilla ice cream melts into the warm cheesecake, creating a dreamy combination.
- Caramel sauce: Drizzling extra salted caramel sauce over each slice enhances sweetness and adds a luxurious touch that everyone will love.
- Fresh fruit salad: A refreshing mix of seasonal fruits balances out the richness of the cheesecake while adding a pop of color to your plate.
- Coffee or tea: Serving warm beverages alongside your dessert can enhance flavors and create a cozy atmosphere for sharing this delightful treat.
Now that you have all these serving suggestions ready, you’re set to impress family and friends with your homemade Apple Crisp Cheesecake! Enjoy every bite!
Make Ahead and Storage
This Apple Crisp Cheesecake is not just a delightful dessert; it’s also perfect for meal prep! You can make it ahead of time, making your life easier when you’re entertaining or simply want a sweet treat on hand.
Storing Leftovers
- Store any leftover cheesecake in the refrigerator.
- Place it in an airtight container or cover the springform pan with plastic wrap.
- It will keep well for about 5-7 days.
Freezing
- To freeze, let the cheesecake cool completely.
- Wrap it tightly in plastic wrap and then in aluminum foil to prevent freezer burn.
- It can be frozen for up to 2 months. For best results, thaw it overnight in the refrigerator before serving.
Reheating
- If you prefer your cheesecake at room temperature, simply take it out of the fridge and let it sit for about 30 minutes before serving.
- If you want to warm it slightly, place individual slices in the microwave for about 10-15 seconds.
FAQs
Have questions about making this delicious Apple Crisp Cheesecake? Here are some common inquiries:
Can I use different types of apples for the Apple Crisp Cheesecake?
Absolutely! While Granny Smith and Gala are great options due to their balance of tartness and sweetness, feel free to experiment with other varieties like Honeycrisp or Fuji for a different flavor profile.
What should I serve with Apple Crisp Cheesecake?
This dessert pairs wonderfully with a drizzle of salted caramel sauce, whipped cream, or even a scoop of non-dairy ice cream if you’re looking for a creamy complement.
How do I make sure my Apple Crisp Cheesecake doesn’t crack?
To prevent cracking, ensure that your cream cheese is at room temperature before mixing. Additionally, using a water bath while baking helps maintain even temperature and moisture.
Can I make this Apple Crisp Cheesecake without sour cream?
Yes! If you prefer not to use sour cream, you can substitute it with an equal amount of Greek yogurt or additional cream cheese blended until smooth.
Final Thoughts
I hope this Apple Crisp Cheesecake becomes a cherished recipe in your kitchen! Its creamy texture combined with the comforting flavors of cinnamon and apple makes it truly special. Enjoy creating this delicious dessert, and don’t hesitate to share your experience or any variations you try. Happy baking!
Apple Crisp Cheesecake
Indulge in the comforting flavors of this Apple Crisp Cheesecake, a delightful fusion of creamy cheesecake and spiced cinnamon apples, all crowned with a crunchy oatmeal crumble. Perfect for any occasion, whether it’s a cozy evening at home or a festive gathering, this dessert is sure to evoke warm memories of fall. With its easy preparation and impressive presentation, it’s a treat that will quickly become a staple in your dessert repertoire.
- Prep Time: 30 minutes
- Cook Time: 55 minutes
- Total Time: 1 hour 25 minutes
- Yield: Approximately 10 servings 1x
- Category: Dessert
- Method: Baking
- Cuisine: American
Ingredients
- 3 cups graham crumbs
- 3 tablespoons brown sugar
- 1/2 teaspoon cinnamon
- 1/2 cup unsalted butter (melted)
- 2 large apples (Granny Smith or Gala)
- 2 tablespoons brown sugar
- 1 1/2 teaspoons cinnamon
- 1/2 cup all-purpose flour
- 1/2 cup brown sugar
- 1 teaspoon cinnamon
- 1/2 cup quick oats
- 1/4 cup unsalted butter (melted)
- 24 ounces full-fat cream cheese (room temperature)
- 3/4 cup granulated sugar
- 1/4 cup brown sugar
- 1/2 teaspoon cinnamon
- 1 tablespoon cornstarch
- 1 teaspoon vanilla extract
- 1/2 cup sour cream (room temperature)
- 3 large eggs (room temperature)
- boiling water (for the water bath)
- salted caramel sauce
Instructions
- Preheat oven to 350F (180C) and prepare a springform pan by wrapping it in foil and greasing it.
- Mix graham crumbs, brown sugar, cinnamon, and melted butter until well combined; press into the bottom of the pan.
- Toss sliced apples with brown sugar and cinnamon; set aside.
- Beat cream cheese until smooth; gradually add sugars, then mix in cinnamon, cornstarch, vanilla extract, and sour cream. Add eggs one at a time until blended.
- Layer half of the cheesecake filling over the crust, followed by apples, then the remaining filling.
- Bake in a water bath for about 55 minutes until set around edges but slightly jiggly in the center.
- Cool gradually in the oven with door ajar before chilling for at least 4 hours or overnight.
Nutrition
- Serving Size: 1 slice (100g)
- Calories: 345
- Sugar: 25g
- Sodium: 220mg
- Fat: 22g
- Saturated Fat: 12g
- Unsaturated Fat: 6g
- Trans Fat: 0g
- Carbohydrates: 34g
- Fiber: 2g
- Protein: 6g
- Cholesterol: 90mg

