Pumpkin Oreo Balls
If you’re looking for a delightful treat that captures the spirit of fall, you’ve come to the right place! These Pumpkin Oreo Balls are an easy, no-bake dessert that combines the beloved flavors of pumpkin and chocolate. They are perfect for family gatherings, cozy nights at home, or when you just want to impress friends with something special. Plus, they’re super fun to make and decorate, so get ready for some kitchen creativity!
This recipe is not only delicious but also incredibly simple. With just a few ingredients, you’ll whip up these adorable pumpkin-inspired treats in no time. Trust me, everyone will be raving about how cute and tasty they are!
Why You’ll Love This Recipe
- Quick and easy: This no-bake dessert comes together in a flash—perfect for busy weeknights!
- Fun to make: Kids can help with shaping the balls and decorating them; it’s a great activity for family bonding.
- Deliciously festive: The combination of Oreo cookies and creamy filling makes for a treat that’s hard to resist.
- Make-ahead friendly: You can prepare these in advance and keep them in the fridge until it’s time to serve.
- Versatile delight: Great for any occasion—whether it’s Halloween, Thanksgiving, or just a cozy gathering with friends.
Ingredients You’ll Need
Making these Pumpkin Oreo Balls is as simple as gathering a few wholesome ingredients. Let’s see what you need:
For the Pumpkin Oreo Balls
- 36 Oreo cookies
- 8 oz cream cheese (softened)
- 12 oz orange candy melts
Variations
One of the best things about this recipe is its flexibility! You can easily adapt it to suit your taste preferences. Here are some fun ideas:
- Add spices: Mix in a pinch of cinnamon or nutmeg to give your filling an extra autumnal kick.
- Try different coatings: Use white chocolate or dark chocolate instead of orange candy melts for a unique twist.
- Change up the decorations: Top your balls with mini chocolate chips or edible glitter for added flair.
- Go gluten-free: Use gluten-free Oreo cookies if you’re catering to dietary restrictions.
How to Make Pumpkin Oreo Balls
Step 1: Prepare the Cookies
Start by pulsing those Oreo cookies in a food processor until they become fine crumbs. This step is crucial because it creates the perfect texture for your pumpkin balls. If you don’t have a food processor, you can put them in a ziplock bag and crush them with a rolling pin—great stress relief too!
Step 2: Combine with Cream Cheese
Mix the finely crumbled Oreos with softened cream cheese until well combined. This creates a rich and creamy mixture that binds everything together beautifully. It’s important to make sure there are no lumps here; we want every bite to be smooth and delicious.
Step 3: Shape into Balls
Scoop out about one inch of the mixture and roll it into balls. Place these on a parchment-covered baking sheet. Pop them into the refrigerator for about 15 minutes; this helps them firm up nicely before decorating.
Step 4: Create Pumpkin Details
Using a toothpick, gently score lines into each ball to resemble pumpkins. This little detail makes your treats look even cuter! After scoring, return them to the fridge for another 10 minutes so they hold their shape during dipping.
Step 5: Melt the Chocolate
While your pumpkin balls are chilling, melt those orange candy melts according to package directions—either using a double boiler or microwave works perfectly! Melting chocolate is key here; it should be smooth enough to coat each ball evenly.
Step 6: Dip and Decorate
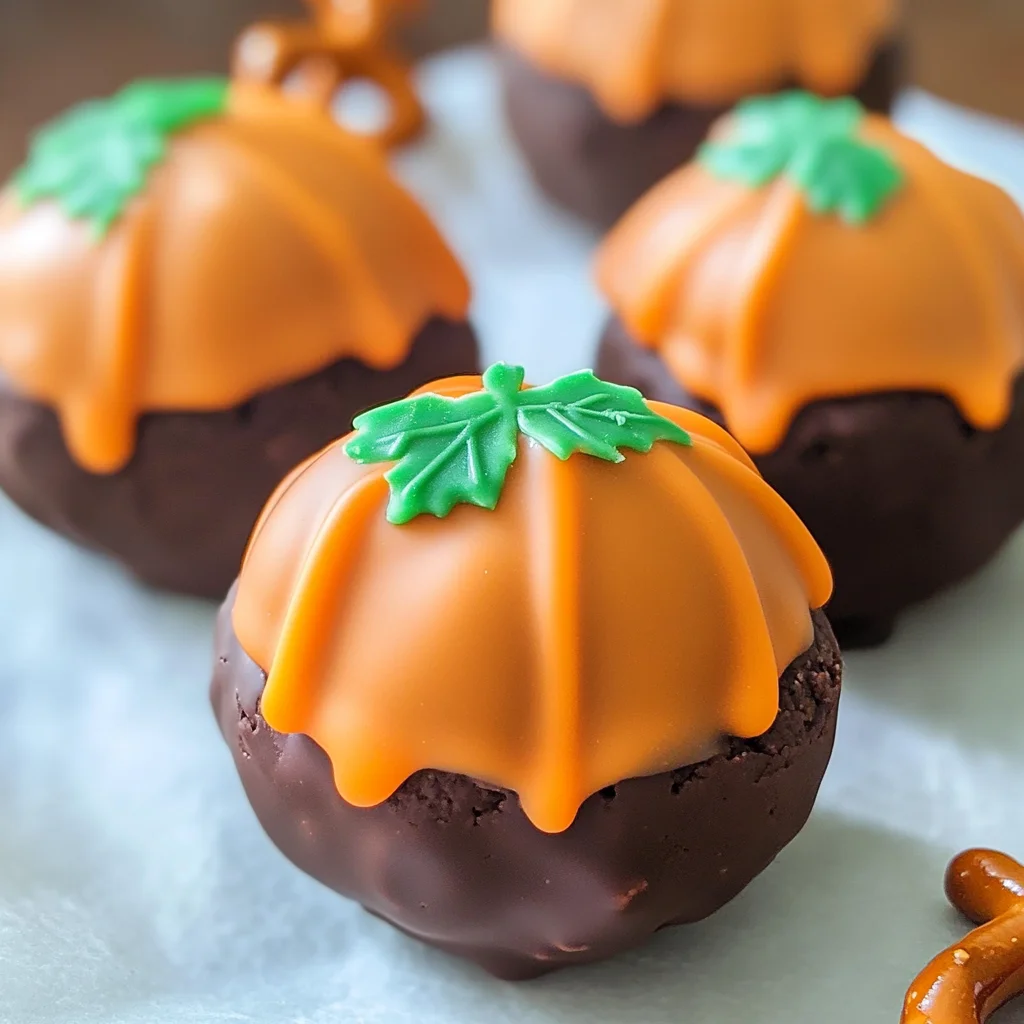
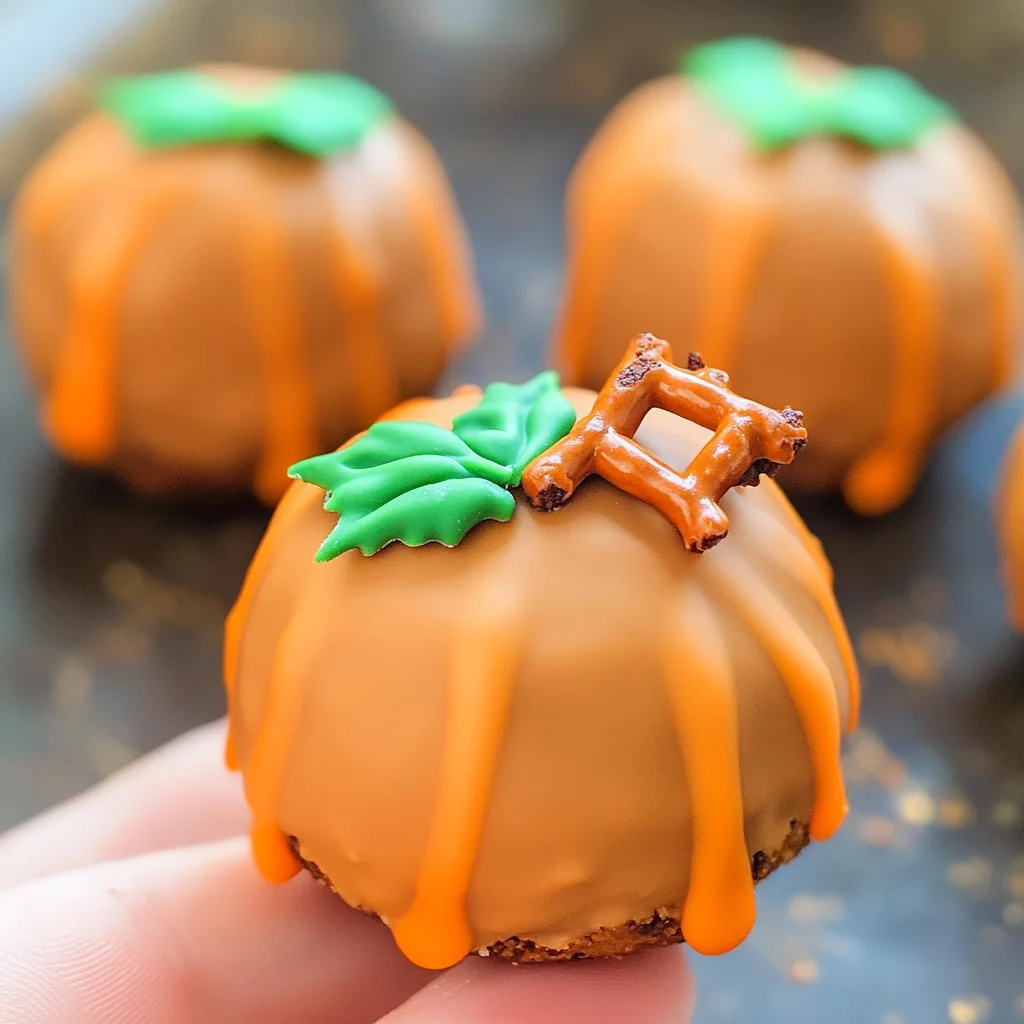
Now comes the fun part! Dip each pumpkin ball into the melted orange chocolate, shaking off any excess before placing them back on the lined baking sheet. Don’t forget to add your pretzel stick as the stem and drizzle on some green icing as leaves right away while the chocolate is still warm!
Step 7: Chill Until Ready to Serve
Finally, let your beautifully decorated Pumpkin Oreo Balls chill in the refrigerator until you’re ready to serve. Trust me; these will be gone before you know it! Enjoy this festive treat with family and friends—it’s sure to bring smiles all around!
Pro Tips for Making Pumpkin Oreo Balls
Making Pumpkin Oreo Balls is a delightful and straightforward process, and a few handy tips can elevate your treats to the next level!
-
Use room temperature cream cheese – Softened cream cheese blends better with the crushed Oreos, creating a smoother mixture that’s easier to scoop into balls.
-
Chill before dipping – Refrigerating the formed balls before dipping them in chocolate helps them hold their shape and prevents them from melting into a puddle in the warm candy melts.
-
Work quickly with the candy melts – Once melted, candy melts can harden quickly. Dip and decorate your Oreo balls right away to ensure everything sticks together beautifully.
-
Experiment with colors – While orange is classic for Halloween or fall, don’t hesitate to use other colors of candy melts for different occasions! You can create festive variations for birthdays or holidays.
-
Store properly – To keep your Pumpkin Oreo Balls fresh, store them in an airtight container in the refrigerator. They will last up to a week!
How to Serve Pumpkin Oreo Balls
These charming little treats are not only delicious but also visually appealing. Presenting them well can make your dessert table shine!
Garnishes
- Sprinkles – Add some colorful sprinkles on top before the chocolate sets for an extra pop of fun and color.
- Edible glitter – A light dusting of edible glitter can give your pumpkin oreo balls a magical touch, perfect for special celebrations.
Side Dishes
- Fruit platter – A vibrant assortment of seasonal fruits like apples, pears, and grapes provides a refreshing contrast to the rich sweetness of the oreo balls.
- Mini pumpkin muffins – These delightful muffins complement the pumpkin flavor while adding a different texture to your dessert spread.
- Spiced chai tea – The warm spices in chai tea create a cozy pairing with the creamy and sweet flavors of Pumpkin Oreo Balls, making it perfect for fall gatherings.
- Whipped coconut cream – Serve alongside some whipped coconut cream for those who enjoy a light and fluffy contrast to their treats.
With these tips and serving ideas, you’ll have everything you need to impress friends and family at your next gathering! Enjoy creating these delightful Pumpkin Oreo Balls that are sure to be a hit!
Make Ahead and Storage
These Pumpkin Oreo Balls are perfect for meal prep, making them an excellent choice for parties or festive gatherings. You can easily whip them up in advance, leaving you with more time to enjoy the festivities!
Storing Leftovers
- Keep the Pumpkin Oreo Balls in an airtight container.
- Store them in the refrigerator for up to 5 days.
- For best results, separate layers with parchment paper if stacking.
Freezing
- Freeze the Pumpkin Oreo Balls before decorating for optimal texture.
- Place them in a single layer on a baking sheet and freeze for about 1 hour.
- Transfer them to a freezer-safe container or bag and store for up to 3 months.
Reheating
- These treats are best enjoyed chilled or at room temperature; no reheating is required.
- If frozen, let them thaw in the refrigerator overnight before serving.
FAQs
Have questions? We’ve got you covered! Here are some common inquiries about Pumpkin Oreo Balls.
Can I make Pumpkin Oreo Balls without cream cheese?
Yes! You can substitute cream cheese with a dairy-free alternative like vegan cream cheese or even a nut-based spread for a similar creamy texture.
How do I store leftover Pumpkin Oreo Balls?
Store your leftover Pumpkin Oreo Balls in an airtight container in the fridge for up to 5 days. They also freeze well if you want to extend their shelf life!
Can I change the coating color for these Pumpkin Oreo Balls?
Absolutely! Feel free to use any colored candy melts that suit your occasion—think green for Halloween or pastels for springtime!
Are Pumpkin Oreo Balls suitable for kids?
Definitely! Kids love these treats, and they’re easy to make together as a fun kitchen activity. Just ensure there are no allergies to any ingredients used.
Final Thoughts
I hope this recipe brightens your fall celebrations with its delightful flavors and fun presentation! There’s something special about creating treats that bring joy, especially when they look as good as they taste. Enjoy making these Pumpkin Oreo Balls with family and friends, and don’t hesitate to share your creations with us. Happy baking!
Pumpkin Oreo Balls
Indulge in the delightful spirit of fall with these easy-to-make Pumpkin Oreo Balls! This no-bake dessert combines the beloved flavor of pumpkin with rich chocolate, making it perfect for family gatherings, cozy nights at home, or simply impressing friends. With just a handful of simple ingredients, you can whip up these adorable treats that are sure to be a hit at any occasion. Get ready to unleash your creativity in the kitchen as you shape and decorate these festive pumpkin-inspired bites!
- Prep Time: 20 minutes
- Cook Time: 0 minutes
- Total Time: 20 minutes
- Yield: Approximately 24 servings 1x
- Category: Dessert
- Method: No-bake
- Cuisine: American
Ingredients
- 36 Oreo cookies
- 8 oz cream cheese (softened)
- 12 oz orange candy melts
Instructions
- Prepare the Cookies: Crush the Oreo cookies into fine crumbs using a food processor or by placing them in a ziplock bag and rolling them with a pin.
- Combine with Cream Cheese: In a bowl, mix the crushed Oreos with softened cream cheese until well combined and smooth.
- Shape into Balls: Scoop out about one inch of the mixture and roll into balls. Place on a parchment-lined baking sheet and refrigerate for 15 minutes.
- Create Pumpkin Details: Use a toothpick to score lines on each ball to resemble pumpkins. Chill again for 10 minutes.
- Melt the Chocolate: Melt the orange candy melts according to package instructions until smooth.
- Dip and Decorate: Dip each pumpkin ball into the melted chocolate, place back on the baking sheet, then add pretzel sticks for stems and drizzle green icing for leaves immediately.
- Chill Until Ready to Serve: Let decorated balls chill in the fridge until serving time.
Nutrition
- Serving Size: 1 serving
- Calories: 140
- Sugar: 9g
- Sodium: 65mg
- Fat: 7g
- Saturated Fat: 4g
- Unsaturated Fat: 2g
- Trans Fat: 0g
- Carbohydrates: 18g
- Fiber: 0g
- Protein: 1g
- Cholesterol: 10mg