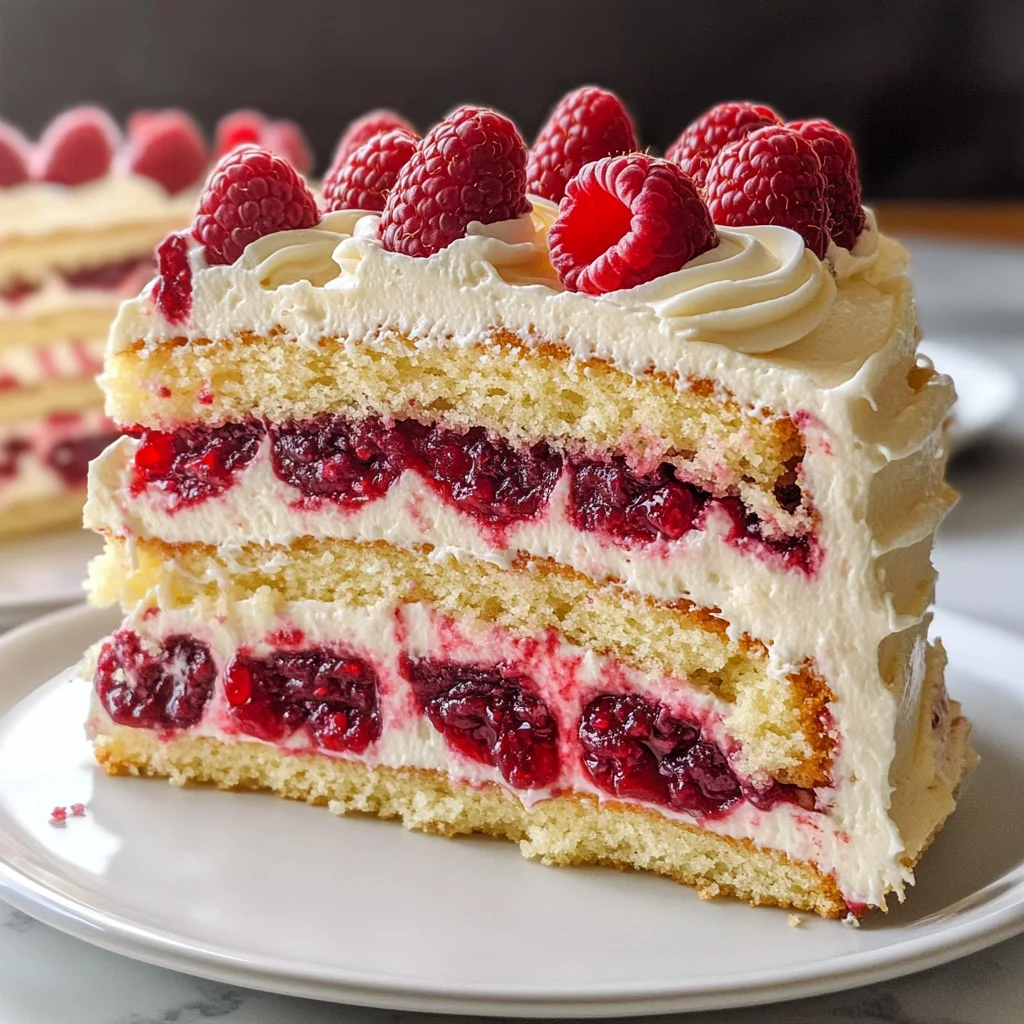
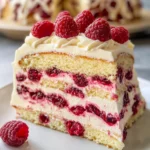
White Chocolate Raspberry Dream Cake
If you’re looking for a dessert that truly delights, the White Chocolate Raspberry Dream Cake is your answer! This cake has stolen my heart (and my taste buds) with its luscious layers of moist cake, creamy white chocolate, and the bright burst of tangy raspberries. It’s perfect for any occasion—whether it’s a cozy family dinner or a special celebration with friends. Each slice feels like a little piece of bliss, making it hard not to go back for seconds!
What makes this cake even more special is how easy it is to whip up. You’ll find that it becomes a go-to recipe in your kitchen, bringing smiles and joy to everyone who gets to enjoy it!
Why You’ll Love This Recipe
- Easy to make: With simple steps and ingredients, you can create a stunning cake without stress.
- Family-friendly: The sweet and tangy combination delights both kids and adults alike!
- Make-ahead option: Prepare the cake in advance and chill it before serving, so you can enjoy more time with loved ones.
- Versatile flavor: The pairing of white chocolate and raspberries makes this cake a hit for any season or occasion.
- Gorgeous presentation: With its beautiful layers and fresh raspberry garnish, it’s sure to impress your guests!

Ingredients You’ll Need
Gathering the ingredients for this White Chocolate Raspberry Dream Cake is a breeze! You’ll be using simple, wholesome items that are likely already in your pantry or easily accessible at your local store.
For the Cake
- 2 1/2 cups all-purpose flour
- 2 teaspoons baking powder
- 1/2 teaspoon baking soda
- 1/2 teaspoon salt
- 1 cup unsalted butter
- 1 1/2 cups granulated sugar
- 4 large eggs
- 1 teaspoon vanilla extract
- 1 cup whole milk
- 1/2 cup sour cream
- 6 ounces white chocolate, melted
For the Filling
- 1 1/2 cups fresh raspberries
- 1/2 cup raspberry jam
For the Whipped Cream Frosting
- 2 cups heavy whipping cream
- 2 tablespoons powdered sugar
- 1 teaspoon vanilla extract
Variations
One of the best things about this recipe is how flexible it is! You can easily switch things up to suit your tastes or what you have on hand.
- Add citrus zest: A bit of lemon or orange zest in the batter adds a refreshing twist.
- Switch the berries: Try using strawberries or blueberries if raspberries aren’t your favorite.
- Chocolate layer: Mix in some cocoa powder for a chocolate version by replacing some flour with cocoa!
- Nutty crunch: Add chopped nuts like almonds or hazelnuts to the layers for extra texture.
How to Make White Chocolate Raspberry Dream Cake
Step 1: Preheat Your Oven
Preheat your oven to 350°F (175°C). This step is crucial as it ensures that your cake bakes evenly. A hot oven helps create that lovely rise and tender crumb we all want in a cake!
Step 2: Prepare Your Pans
Grease and flour two 9-inch round cake pans. This prevents sticking and makes it easier to remove the cakes once they’re baked. Trust me; you want those beautiful layers intact!
Step 3: Mix Dry Ingredients
In a medium-sized bowl, whisk together the all-purpose flour, baking powder, baking soda, and salt until well combined. This step helps distribute the leavening agents evenly throughout your flour so that every bite rises beautifully.
Step 4: Cream Butter and Sugar
In a large mixing bowl, cream together the unsalted butter and granulated sugar using an electric mixer on medium speed until light and fluffy, about 3-4 minutes. Creaming incorporates air into the mixture, giving your cake that delightful lightness.
Step 5: Add Eggs One at a Time
Add the eggs one at a time, beating well after each addition. This allows each egg to fully incorporate into the batter, contributing moisture and richness.
Step 6: Mix in Vanilla Extract
Stir in the vanilla extract until fully combined. That warm vanilla aroma will set the stage for deliciousness!
Step 7: Combine Milk and Sour Cream
In another bowl, combine the whole milk and sour cream. Stir until smooth. This mixture adds moisture and richness to our cake while keeping it tender.
Step 8: Combine Wet and Dry Ingredients
Gradually add the dry ingredients to the butter mixture while alternating with the milk mixture. Start and end with dry ingredients. Mixing alternates helps prevent overmixing which can lead to tough cakes.
Step 9: Fold in White Chocolate
Gently fold in the melted white chocolate until fully incorporated. This adds that dreamy sweetness we love about white chocolate!
Step 10: Bake Your Cakes
Divide the batter evenly between prepared pans. Smooth tops with a spatula before baking for an even finish. Bake for about 25-30 minutes or until a toothpick comes out clean from the center.
Step 11: Cool Down
Once baked, let cool in pans for about 10 minutes before transferring them onto wire racks to cool completely. Cooling prevents sogginess when layering.
Step 12: Make Raspberry Filling
While cakes are cooling, prepare raspberry filling by mashing fresh raspberries until broken down into small pieces. Stir in raspberry jam until fully combined—this fruity layer adds such brightness!
Step 13: Whip Cream Frosting
To make whipped cream frosting, beat heavy whipping cream with powdered sugar and vanilla extract on high speed until stiff peaks form. This will be our light topping that balances all those flavors beautifully!
Step 14: Assemble Your Cake
Once cool, place one layer on a serving platter. Spread raspberry filling over it followed by whipped cream frosting before adding another layer on top.
Step 15: Final Touches
Spread remaining whipped cream over top and sides of cake then garnish with fresh raspberries for that gorgeous finish!
Step 16: Chill Before Serving
Chill your masterpiece in the refrigerator for at least one hour before serving—it allows everything to set perfectly together.
Now you’re ready to slice into this dreamy creation! Enjoy every bite of your White Chocolate Raspberry Dream Cake!
Pro Tips for Making White Chocolate Raspberry Dream Cake
Creating this dreamy cake is easier than you might think! Here are some pro tips to help you achieve the best results.
-
Use room temperature ingredients: Ensuring that your eggs, butter, and milk are at room temperature helps create a smoother batter, resulting in a fluffier cake.
-
Don’t overmix the batter: Overmixing can lead to a dense cake. Mix just until everything is combined for that light and airy texture we all love.
-
Ensure even baking: Rotate your cake pans halfway through baking to promote even cooking and prevent one side from browning too much.
-
Chill the whipped cream: For better stability, chill your mixing bowl and beaters before whipping the cream. This helps achieve those perfect stiff peaks!
-
Taste as you go: Don’t forget to sample your raspberry filling and whipped cream before layering. Adjusting sweetness can make all the difference in balancing flavors!
How to Serve White Chocolate Raspberry Dream Cake
Presenting your White Chocolate Raspberry Dream Cake beautifully will surely impress your guests! Here are some delightful ideas on how to serve this lovely dessert.
Garnishes
- Fresh mint leaves: A few sprigs of mint add a pop of color and freshness, enhancing both presentation and flavor.
- Chocolate shavings: Sprinkle some delicate white or dark chocolate shavings on top for an elegant touch that complements the cake’s sweetness.
- A dusting of powdered sugar: Lightly dusting powdered sugar over the top right before serving gives it a beautiful finish and adds a subtle sweetness.
Side Dishes
- Vanilla ice cream: A scoop of creamy vanilla ice cream pairs wonderfully with the rich flavors of the cake, providing a nice contrast in temperature.
- Berry compote: A homemade berry compote made from mixed berries drizzled around the plate adds tartness and elevates the presentation.
- Lemon sorbet: The refreshing citrus flavor of lemon sorbet cuts through the richness of the cake, making it a delightful palate cleanser.
- Coffee or tea: Serving warm coffee or herbal tea alongside this dessert creates a comforting experience that balances out the sweetness perfectly.
Now you’re ready to indulge in your delicious creation! Enjoy each slice of this White Chocolate Raspberry Dream Cake with friends and family.
Make Ahead and Storage
This White Chocolate Raspberry Dream Cake is perfect for meal prep! You can make it ahead of time and store it to enjoy later without sacrificing flavor or texture.
Storing Leftovers
- Store leftover cake in an airtight container in the refrigerator.
- It will stay fresh for up to 3 days, but it’s best enjoyed within the first couple of days for optimal flavor.
- If the cake is frosted, ensure it is well covered to prevent it from drying out.
Freezing
- To freeze, wrap individual slices of cake tightly in plastic wrap and then place them in a freezer-safe container or bag.
- You can also freeze the whole cake by wrapping it well before placing it in the freezer.
- The cake can be stored in the freezer for up to 3 months.
Reheating
- Thaw frozen slices in the refrigerator overnight before serving.
- For a warm slice, you can microwave it for about 10-15 seconds, watching closely to avoid overheating.
- Avoid reheating any whipped cream topping; instead, add fresh whipped cream after thawing if desired.
FAQs
If you have questions about this delightful recipe, you’re in the right place!
Can I use frozen raspberries for the White Chocolate Raspberry Dream Cake?
Yes, you can use frozen raspberries. Just make sure to thaw them completely and drain excess liquid before adding them to your filling.
How should I store my White Chocolate Raspberry Dream Cake?
Store your cake in an airtight container in the refrigerator for up to 3 days. For longer storage, freeze individual slices wrapped tightly.
Can I substitute white chocolate with another type of chocolate?
While this recipe highlights white chocolate, you can experiment with milk or dark chocolate if you prefer a different flavor profile. Just remember that it may change the overall taste of your cake!
Is this White Chocolate Raspberry Dream Cake suitable for special occasions?
Absolutely! This cake is not only delicious but also visually stunning, making it perfect for birthdays, anniversaries, or any celebration where you want to impress your guests.
Final Thoughts
I hope you enjoy creating this delectable White Chocolate Raspberry Dream Cake as much as I do! It’s a wonderful blend of flavors that will surely bring smiles all around. Whether you’re celebrating a special occasion or simply treating yourself, this cake is sure to be a hit. Happy baking, and remember—every slice is a little piece of happiness waiting to be savored!
White Chocolate Raspberry Dream Cake
Indulge in the delightful flavors of our White Chocolate Raspberry Dream Cake, a luscious dessert that effortlessly combines the creamy sweetness of white chocolate with the tartness of fresh raspberries. This layered cake is not only visually stunning but also incredibly easy to make, making it a perfect centerpiece for any occasion. Whether you’re hosting a family gathering or celebrating a special event, each bite offers a heavenly taste experience that will leave your guests asking for seconds!
- Prep Time: 30 minutes
- Cook Time: 30 minutes
- Total Time: 1 hour
- Yield: Serves approximately 12 people 1x
- Category: Dessert
- Method: Baking
- Cuisine: American
Ingredients
- 2 1/2 cups all-purpose flour
- 2 teaspoons baking powder
- 1/2 teaspoon baking soda
- 1/2 teaspoon salt
- 1 cup unsalted butter
- 1 1/2 cups granulated sugar
- 4 large eggs
- 1 teaspoon vanilla extract
- 1 cup whole milk
- 1/2 cup sour cream
- 6 ounces white chocolate, melted
- 1 1/2 cups fresh raspberries
- 1/2 cup raspberry jam
- 2 cups heavy whipping cream
- 2 tablespoons powdered sugar
Instructions
- Preheat your oven to 350°F (175°C) and prepare two 9-inch round cake pans by greasing and flouring them.
- In a bowl, whisk together flour, baking powder, baking soda, and salt.
- Cream butter and sugar together until light and fluffy. Add eggs one at a time, followed by vanilla.
- Mix milk and sour cream in another bowl, then alternately combine wet and dry ingredients into the butter mixture.
- Fold in melted white chocolate until fully incorporated.
- Divide the batter evenly between prepared pans. Bake for 25-30 minutes or until a toothpick comes out clean. Cool completely.
- Prepare raspberry filling by mashing raspberries with raspberry jam.
- Beat heavy cream with powdered sugar until stiff peaks form to create frosting.
- Assemble the cake layers with raspberry filling and whipped frosting in between; chill before serving.
Nutrition
- Serving Size: 1 slice (107g)
- Calories: 370
- Sugar: 28g
- Sodium: 150mg
- Fat: 24g
- Saturated Fat: 14g
- Unsaturated Fat: 8g
- Trans Fat: 0g
- Carbohydrates: 36g
- Fiber: <1g
- Protein: 4g
- Cholesterol: 85mg